Wednesday, November 17, 2010

Batik Stars!

I'm a sucker for a sale, what can I say?


When I saw this fat quarter pack on sale, I had to get it. The colors are so bright and the patterns are a funky tie-dye and batik. These fabrics would be a perfect fit for this star quilt. You can find the pattern/instructions here.


Maybe I'll make the background black or a dark grey so the colors pop.

I was thinking about a dear friend lately -- when she had her daughter, I made her a baby blanket with stars, crescent moons, and hearts. It wasn't my best quilting, but apparently her daughter liked it so much that she has "loved it to death!" This would be a good replacement, and I'll probably machine quilt this one so it's extra durable.

But first I have to finish my other two. It's nice to have future quilt plans, though!

Saturday, November 6, 2010

The planning process

The first double wedding ring quilt (for the future in-laws) wasn't really planned. I bought some blue fabrics that I thought might look good together and found the template -- then started cutting and piecing without knowing who or what the quilt was really for. I just knew I really wanted to make a DWR quilt!

Then the cut fabric sat in a box for a few months while college and moving took over my life. After starting work and not having homework take up ALL of my time, I pulled the box out and wondered what I could do with the quilt. When my fiance made a remark about turning 25 next year, I realized his parent's 25th anniversary was coming up. Quilt recipient problem solved! Good thing his mom likes blue. :)

But I knew that I wanted to put a little more thought into our DWR quilt, and make it 'ours' somehow. We're both foresters, so natural colors were a big deal; we decided our wedding colors would be brown and green, so that's how the quilt colors were chosen. I dragged dear fiance to the fabric store, and surprisingly, he really enjoyed being part of the fabric selection process. He told me which patterns and colors he liked and was honest when the fabrics just didn't 'go' together. What a guy!

I sketched up two choices in a watercolor book and showed my guy what we could do pattern-wise. Here's the page:


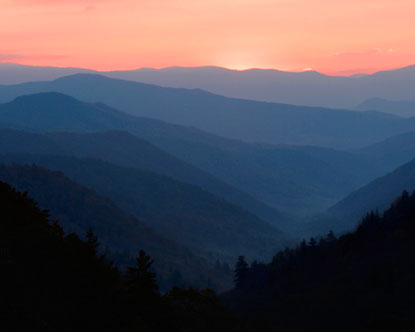
On the left, the brown and green circles get dark and light at different 'intersections'; one's dark over the other color's light arc. The right shows the circles being light and dark at the same intersection. My fiance and I both liked the left more because it seemed to give it more depth. Lighter colors depict objects further away while closer objects are darker; this picture of the Great Smoky Mountains is a perfect example:


So by making the four-patch the darker green or brown color, it will make the quilt look like some rings 'go over' others.

The quilting in the center of the white spaces will be either different leaves (yellow-poplar, red maple, quaking aspen, etc.) or a tree template I've found:


I'm not sure yet.

Wedding Rings - Double!

I've started a double-wedding ring quilt for my future in-laws -- this December marks their 25th wedding anniversary. I'm planning my own wedding and have been thinking wedding gifts; so I decided I wanted to give them something that would have been a good wedding present, not just an anniversary present. What better than a DWR quilt!? I used the McCall's Quilting Vintage Double Wedding Ring pattern.

So now I have this beauty all pieced and spread out on the floor in the spare room:


My hand-quilting (which isn't the best!) has been put on hold. I had tooth surgery recently and it just hurts to bend over it.. but here's some detail:


So while I'm waiting to finish that quilt up, I figured, "Why not start another?" Well, that second quilt would also be a DWR. I mentioned I'm getting married; well, one of my wedding presents to my fiance (and part of a ceremony tradition) is our very own DWR quilt. Since I finished most of the blue quilt above before starting this blog, I figured I'd take pictures of the piecing process on our quilt.

Our wedding colors are green and brown (forestry nerds!) so our quilt will reflect that. First, I split the arch of the template into 5 pieces instead of 11. Then, I traced those 5 pieces onto the fabric and cut, cut, cut away.


Then, the pinning. Oh, the pinning!


And all the while, my poor puppy gives me that look that just says "More pinning?!"


But it's all worth it when you see those piles of perfect finished arches!


Tuesday, November 2, 2010

First post!

I finally did it -- I broke down and made a quilting blog.

I figure this will give me a place to post pictures of works-in-progress for friends and family to see, as well as keep me on track (and motivated!) so I finish those gift-quilts in time. :)

Stay tuned!